The reason I love Django Rest Framework (DRF) is because it elegantly handles data serialization and seamlessly works with Django’s ORM. While Django does a lot of heavy lifting by connecting it’s models to the database, serializing those models into a JSON format is still a big challenge. DRF complements Django by providing a means of converting it’s models to a REST-ful format.
In this tutorial we are going to look at how to use DRF to create a very simple Star Wars themed REST API. We will be assuming you are already familiar with Django models/migrations and REST. At the end of the tutorial we should have the following 4 API endpoints up and running:
/people/(GET/POST)/people/{id}/(GET/PUT)/species/(GET/POST)/species/{id}(GET/PUT)
There are 5 total steps to have our REST API fully working:
- Install and setup Django and DRF
- Set Up Django Models
- Set Up DRF Serializers
- Set Up Views and URLs
- Start Using the API!
Install and Set Up Django and DRF
Let’s start by creating a Python virtual environment and activating it in the desired working directory. For this example I used pyenv to manage my virtual environment.
$ pyenv virtualenv drf
created virtual environment CPython3.6.4.final.0-64 in 400ms
$ pyenv local drf
After the virtual environment is created and activated, let’s install django and djangorestframework which are the necessary Python libraries.
(drf) $ pip3 install django
Successfully installed asgiref-3.3.1 django-3.1.5 pytz-2020.5 sqlparse-0.4.1
(drf) $ pip3 install djangorestframework
Successfully installed djangorestframework-3.12.2
After installing the necessary requirements let’s create a Django project and app.
(drf) $ django-admin startproject my_awesome_django_project
(drf) $ cd my_awesome_django_project
(drf) $ django-admin startapp my_awesome_api
(drf) $ ls
manage.py			my_awesome_api			my_awesome_django_project
After the app is created, let’s register the app by adding the path to the app config in the my_awesome_django_project/settings.py. We should also add rest_api_framework to this list.
INSTALLED_APPS = [
...
    ‘rest_api_framework’,
    'my_awesome_api.apps.MyAwesomeApiConfig'
]
Let’s make sure the app is up and running by using the Django runserver command.
(drf) $ python3 manage.py runserver
Django version 3.1.5, using settings 'my_awesome_django_project.settings'
Starting development server at http://127.0.0.1:8000/
Quit the server with CONTROL-C.
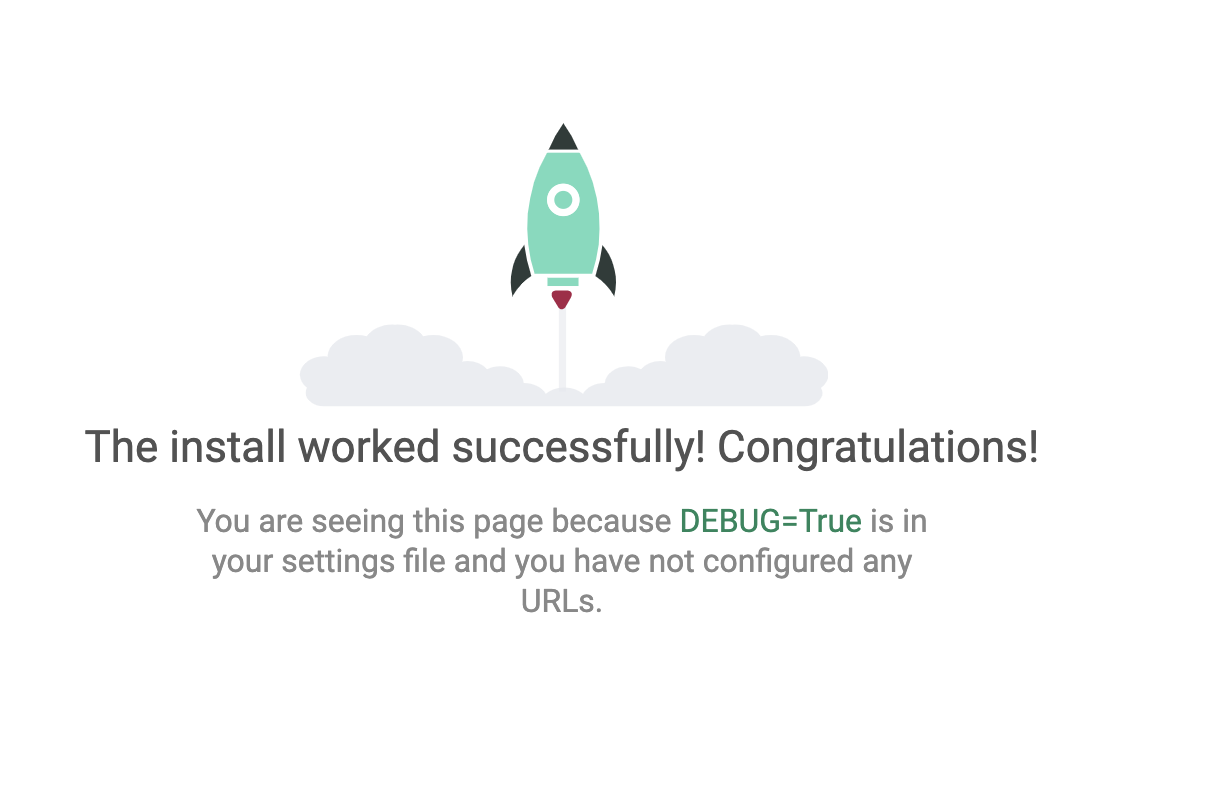
If everything works as shown above, and if we go to http://127.0.0.1:8000/ in the browser we should see the following success message.
Set Up Django Models
At this point we will be mostly editing the files in the my_awesome_api directory. Let’s start by adding Person and Species into my_awesome_api/models.py.
from django.db import models


class Species(models.Model):
   name = models.CharField(max_length=100)
   classification = models.CharField(max_length=100)
   language = models.CharField(max_length=100)


class Person(models.Model):
   name = models.CharField(max_length=100)
   birth_year = models.CharField(max_length=10)
   eye_color = models.CharField(max_length=10)
   species = models.ForeignKey(Species, on_delete=models.DO_NOTHING)
After the models have been added, let’s run the migrations to let Django know that we are going to add 2 new tables to the database.
The first step is to create a new migration by running the makemigrations command.
(drf) $ python3 manage.py makemigrations
Migrations for 'my_awesome_api':
  my_awesome_api/migrations/0001_initial.py
    - Create model Species
    - Create model Person
After the migrations files are created, we can run the migrate command.
(drf) $ python3 manage.py migrate
Operations to perform:
  Apply all migrations: my_awesome_api
Running migrations:
  Applying my_awesome_api.0001_initial... OK
Set Up DRF Serializers
Now that we have added the models and created the tables, it is time to tell DRF how to serialize the models. The serializers will convert the Person model and Species model into JSON that will be used by the API to return the data to the user. We will add the serializers by creating a new file my_awesome_api/serializers.py.
from rest_framework import serializers

from my_awesome_api.models import Person, Species

class PersonSerializer(serializers.ModelSerializer):
   class Meta:
       model = Person
       fields = ('name', 'birth_year', 'eye_color', 'species')


class SpeciesSerializer(serializers.ModelSerializer):
   class Meta:
       model = Species
       fields = ('name', 'classification', 'language')
Set Up Routers and Create API URLs
After the serializers are created we need to create a view to the API and connect it to the Django URLs. Let’s start by adding 2 viewsets for each of the models we created in a new file my_awesome_api/views.py. Viewsets provide the advantage of combining multiple sets of logic into a single class.
from rest_framework import viewsets

from my_awesome_api.serializers import PersonSerializer, SpeciesSerializer
from my_awesome_api.models import Person, Species


class PersonViewSet(viewsets.ModelViewSet):
   queryset = Person.objects.all()
   serializer_class = PersonSerializer


class SpeciesViewSet(viewsets.ModelViewSet):
   queryset = Species.objects.all()
   serializer_class = SpeciesSerializer
After the viewsets are defined we can now use the router functionality provided by DRF to route a desired API endpoint to the given viewset. Let’s create a new file my_awesome_api/urls.py and add the router configuration as shown below.
from django.urls import include, path

from rest_framework import routers

from my_awesome_api.views import PersonViewSet, SpeciesViewSet

router = routers.DefaultRouter()
router.register(r'people', PersonViewSet)
router.register(r'species', SpeciesViewSet)

urlpatterns = [
   path('', include(router.urls)),
]
Finally let’s connect the main Django URL at my_awesome_django_project/urls.py to point to the app’s URL file.
from django.urls import path, include

urlpatterns = [
   path('star-wars/', include('my_awesome_api.urls')),
]
The URLs generated by the routers will have all the desired API methods (GET, POST and PUT) we want. This is because the router automatically maps the URLs to the right handlers .get(), .list(), and .create() in the viewset. Let’s test out the API and make sure everything is working as expected.
Start Using the API
If we go to the http://127.0.0.1:8000/star-wars/species/ URL now, we should be able to use the browsable api to post our species.
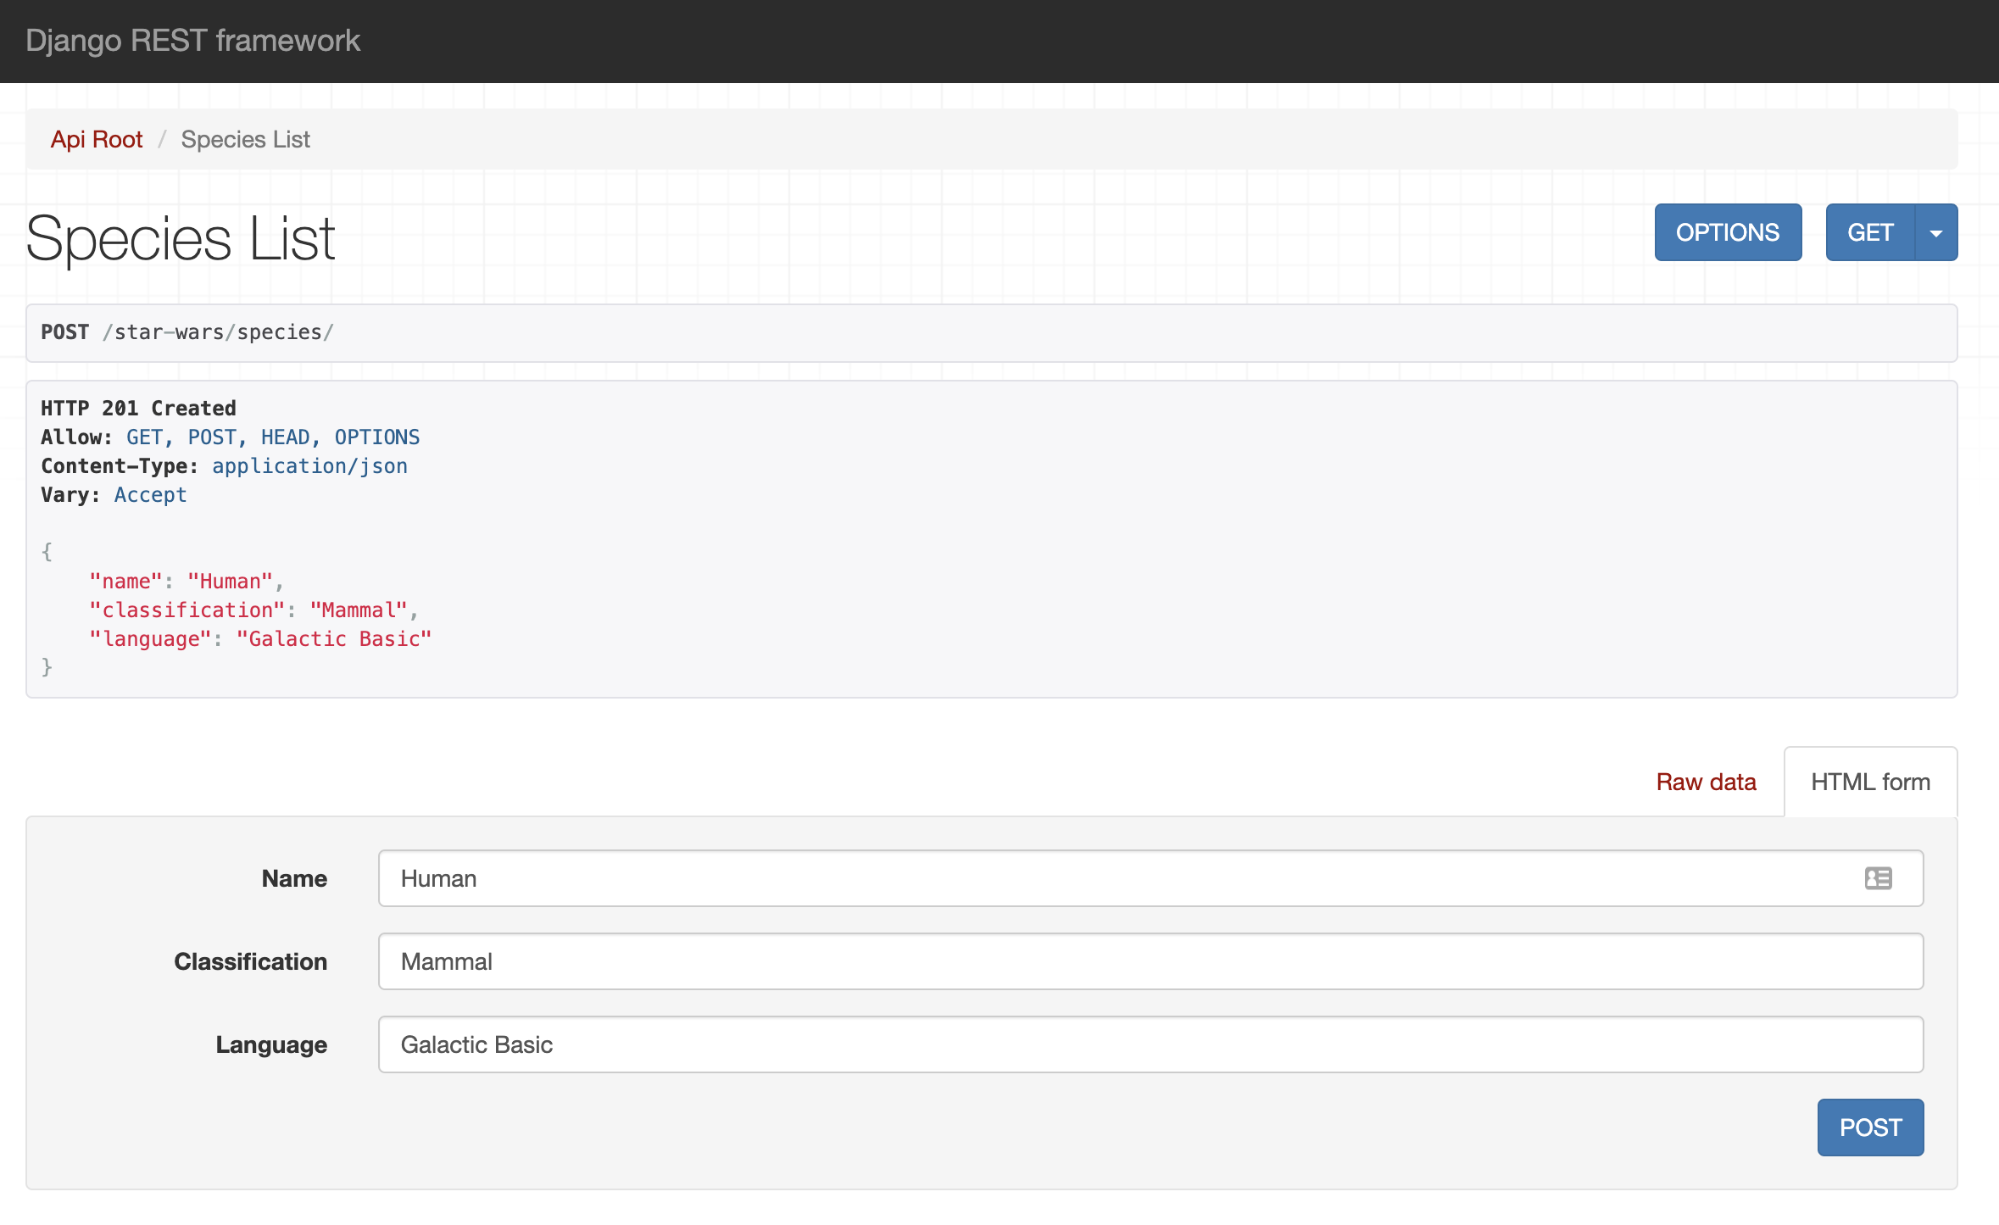
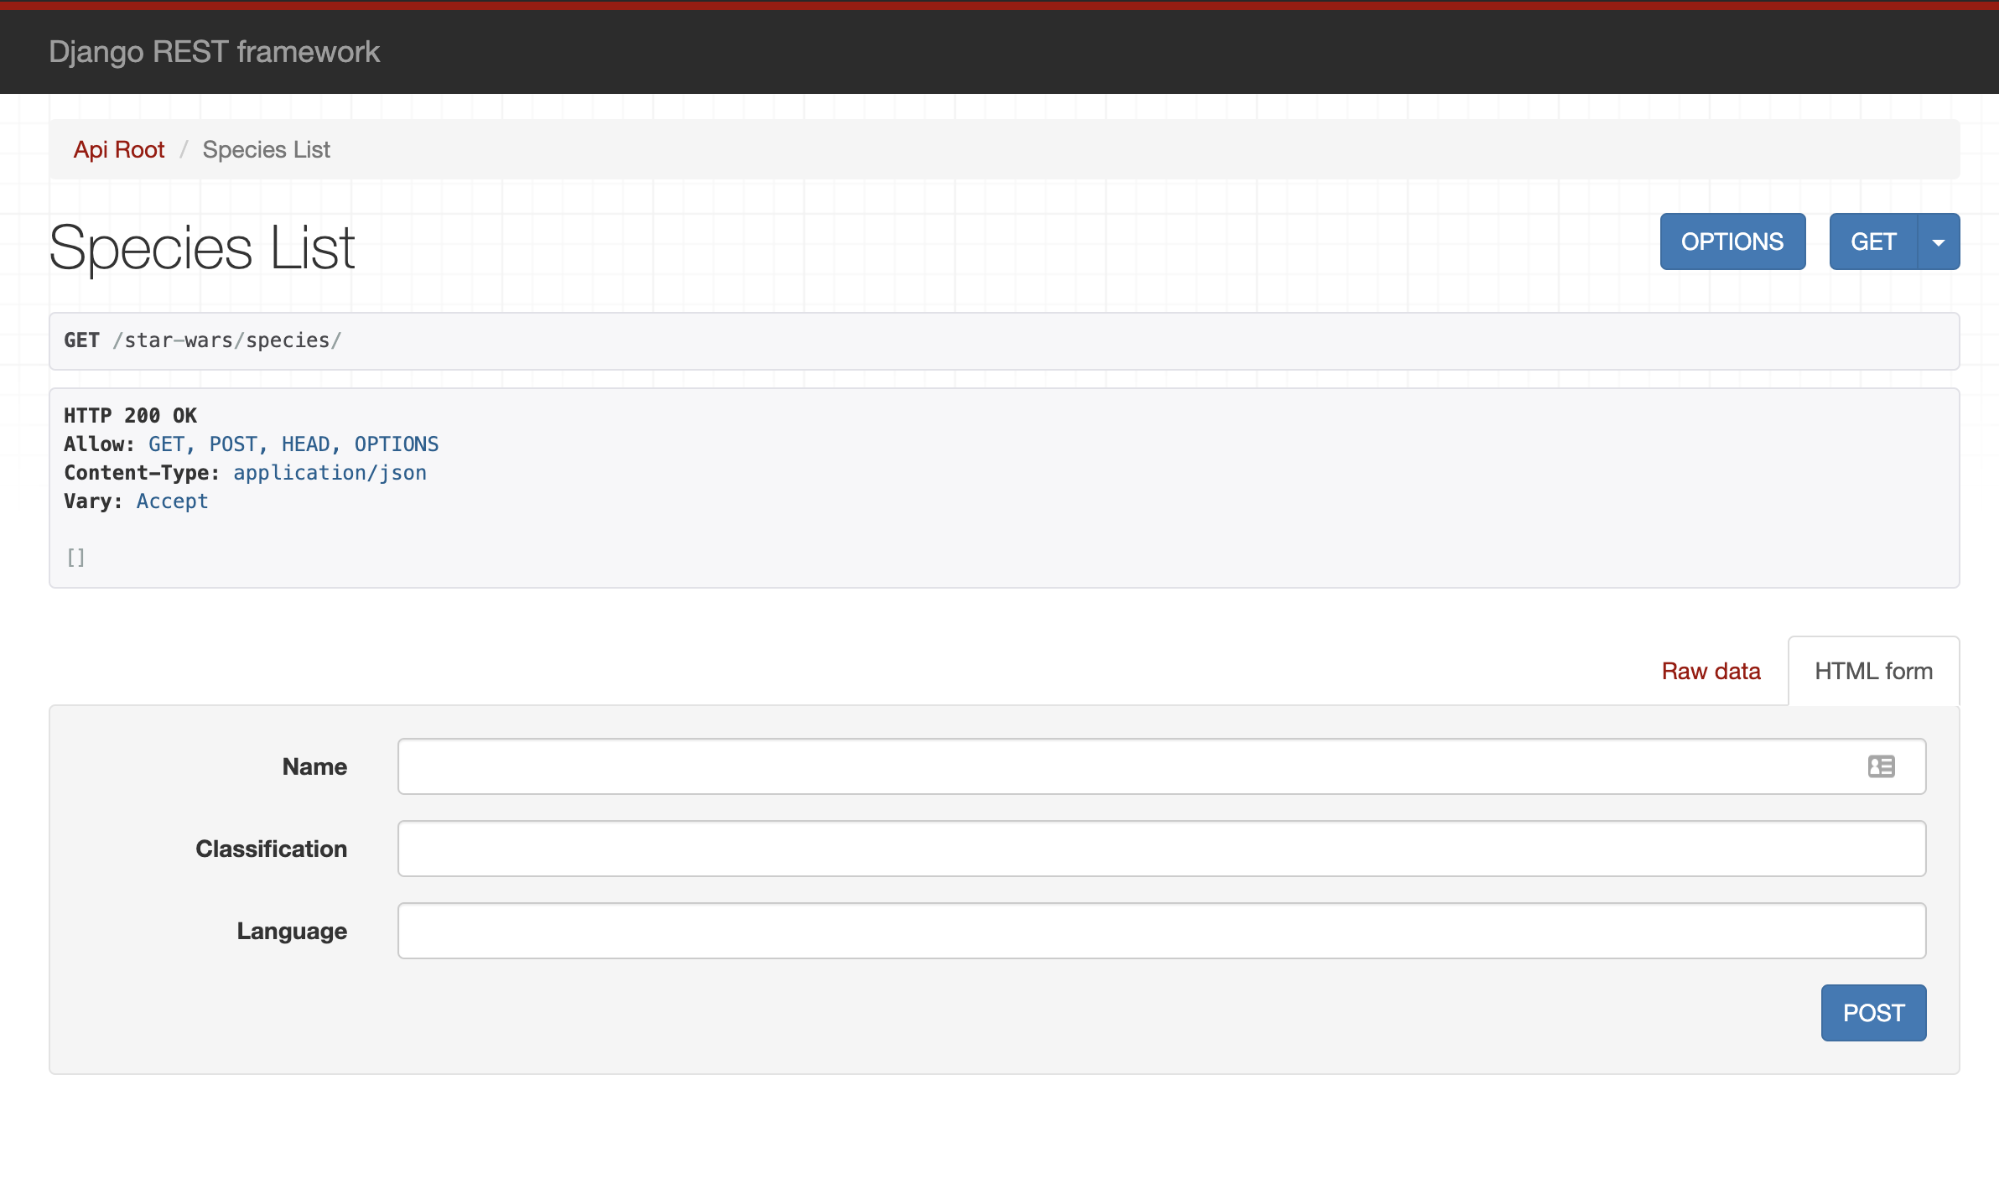 Using the browsable API, we are going to add the species Human into the database. When a species gets successfully created, the server will respond with a 201 success message along with a payload as shown below.
Let’s add another species Wookie using the “Raw data” tab instead.
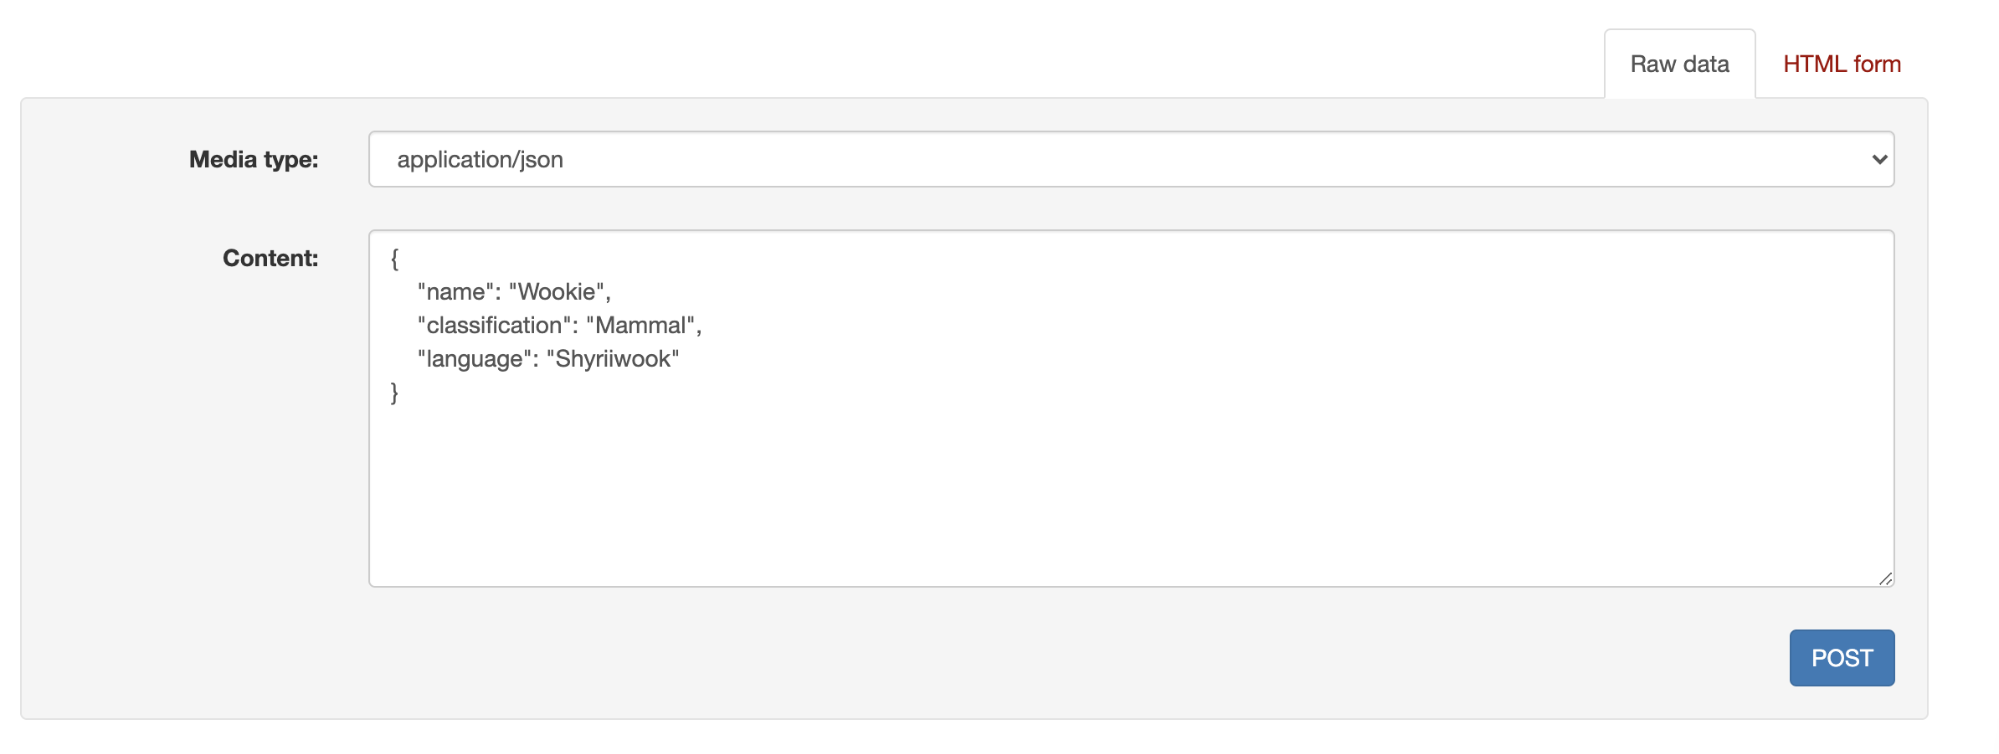
When we hit the POST button we should now have one more species in our database.
Similarly we can also access the People API via http://127.0.0.1:8000/star-wars/people/ and because the Person model has a foreign key to the Species model, the Browsable API will give a nice dropdown to select the relevant species.
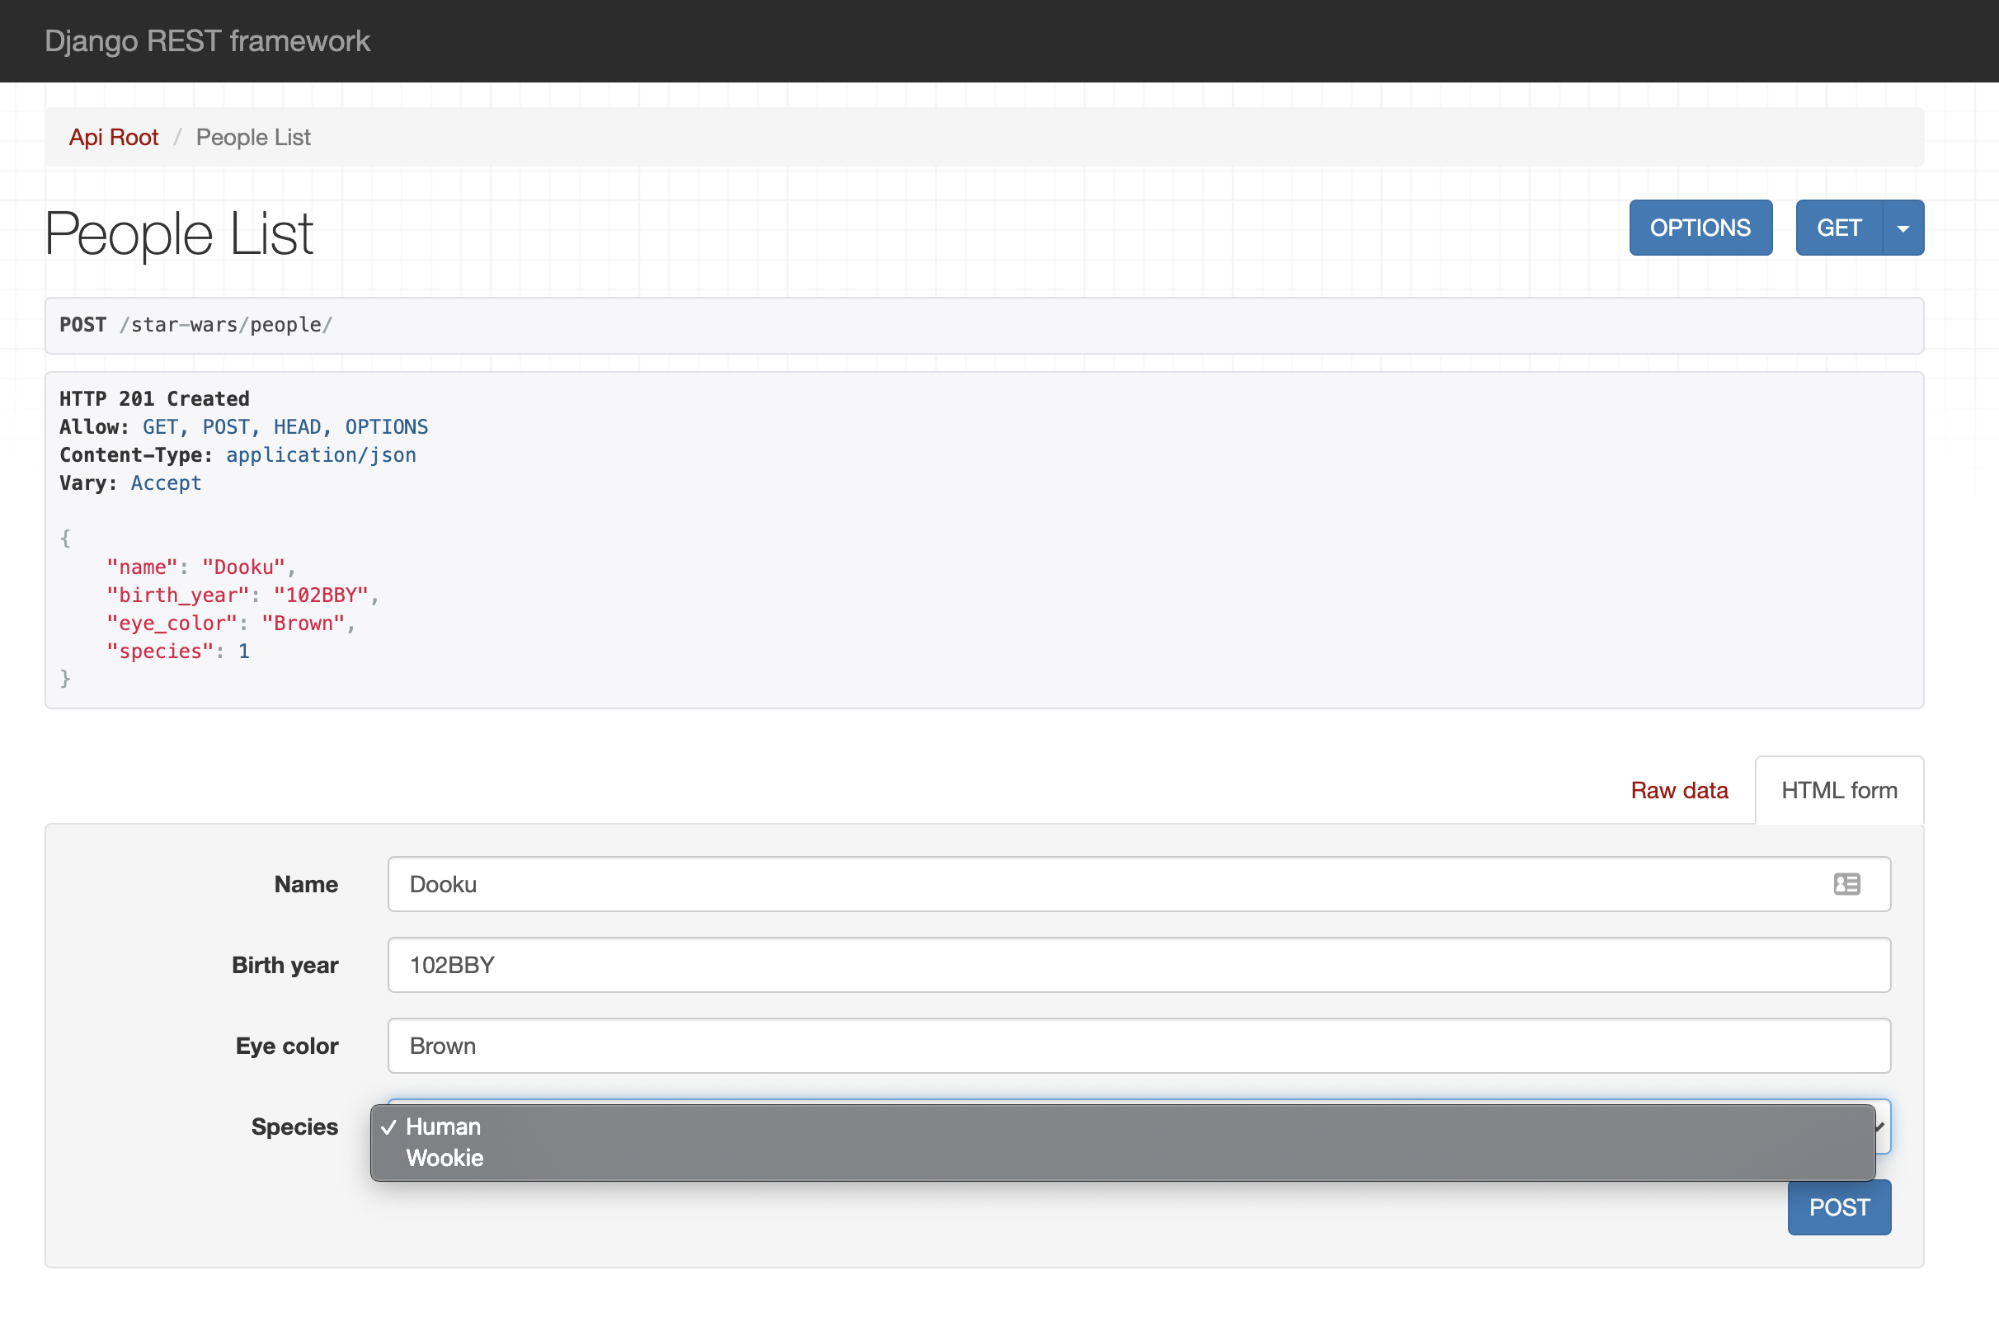
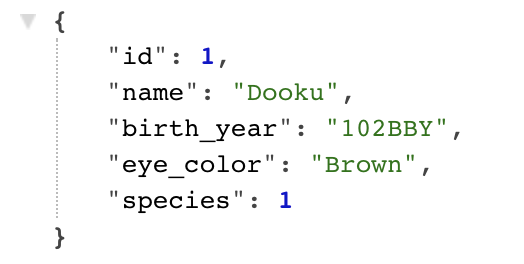
After clicking the post button we have a new Person Dooku.
Similar to species let’s add another Person using the “Raw data” tab. This time we will have to enter the id of the species we want for the person.
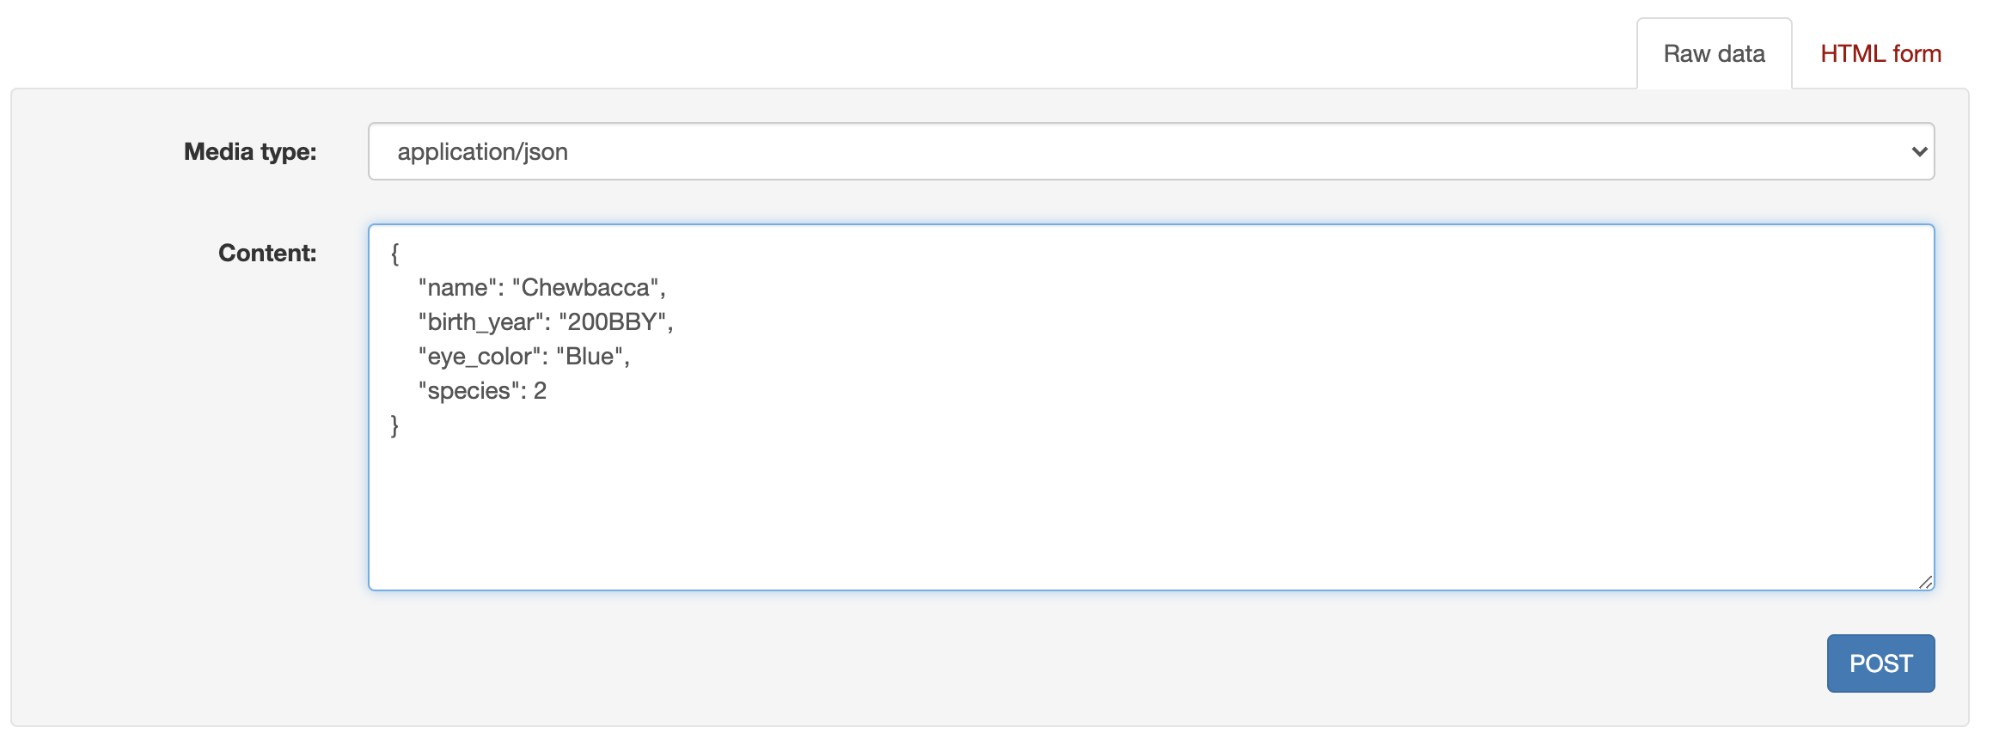
After clicking the post button we should now have a new person Chewbacca in our database.
Now let’s check and make sure all the API endpoints we wanted to build are working correctly.
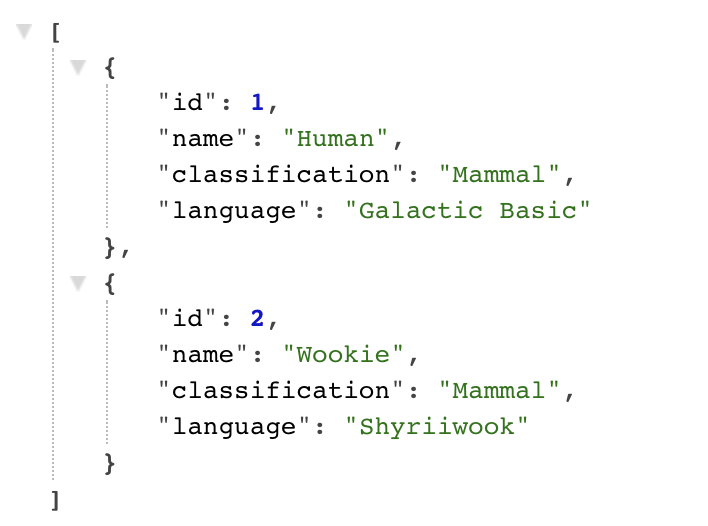
http://127.0.0.1:8000/star-wars/species/?format=json
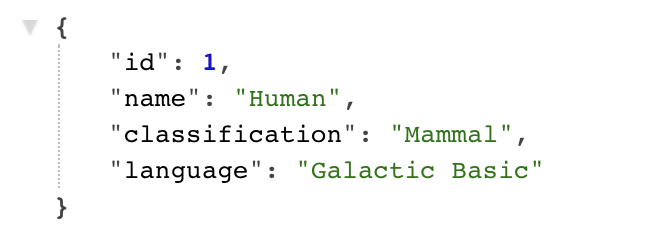
http://127.0.0.1:8000/star-wars/species/1/?format=json
http://127.0.0.1:8000/star-wars/people/?format=json
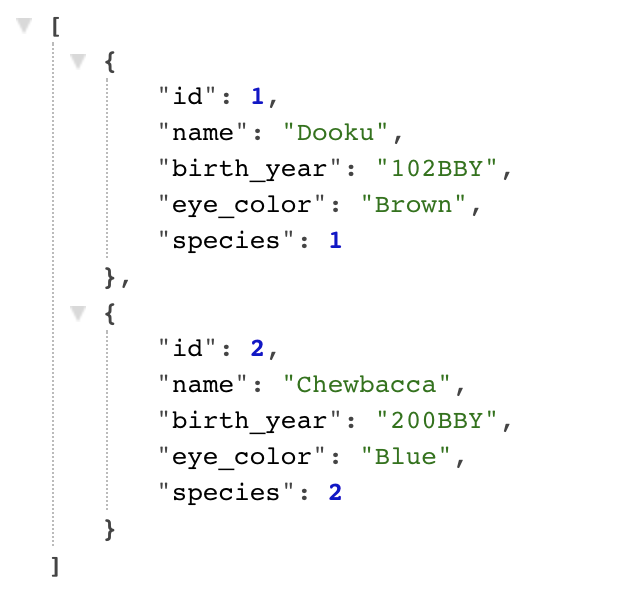
http://127.0.0.1:8000/star-wars/people/1/?format=json
And that’s it! You can see how easy it is to configure DRF and start building REST APIs. We brought up a fully functional API with very little code. At the same time we tested it out using the built in browsable API. And this is just scratching the surface of the library, you should definitely check out the documentation on DRF’s website to learn more.
Like this tutorial? Checkout out our other GinkgoBits tutorial on how we used React Memo for a more performant user experience.
(Feature photo by Omar Flores on Unsplash)